For those that don’t know, CSAT stands for Customer Satisfaction Ratings. It’s a tool that is often used to briefly evaluate the customer’s experience by asking them to rate the support they received (negative or positive)
When CSAT is enabled, end-users receive an email after their questions have been set to Solved. They get the opportunity to not only rate the experience, but also provide comments to further explain their feedback.
CSAT can be one of your most valuable tools when tracking the pulse of your customers. In this tutorial - we are going to run you through how you set it up within Zendesk.
Enabling CSAT
To enable CSAT, you would need to:
- Use a Professional or Enterprise plan on Zendesk.
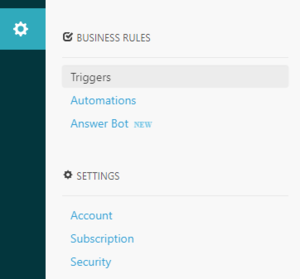
- Have an administrator account. (How do I tell if I’m an admin, I hear you ask: If you have access to a section called “Business Rules” in the settings, then you’re an admin.)
- Once that’s all been established, go here and click “Start Surveying today” to kick things off.
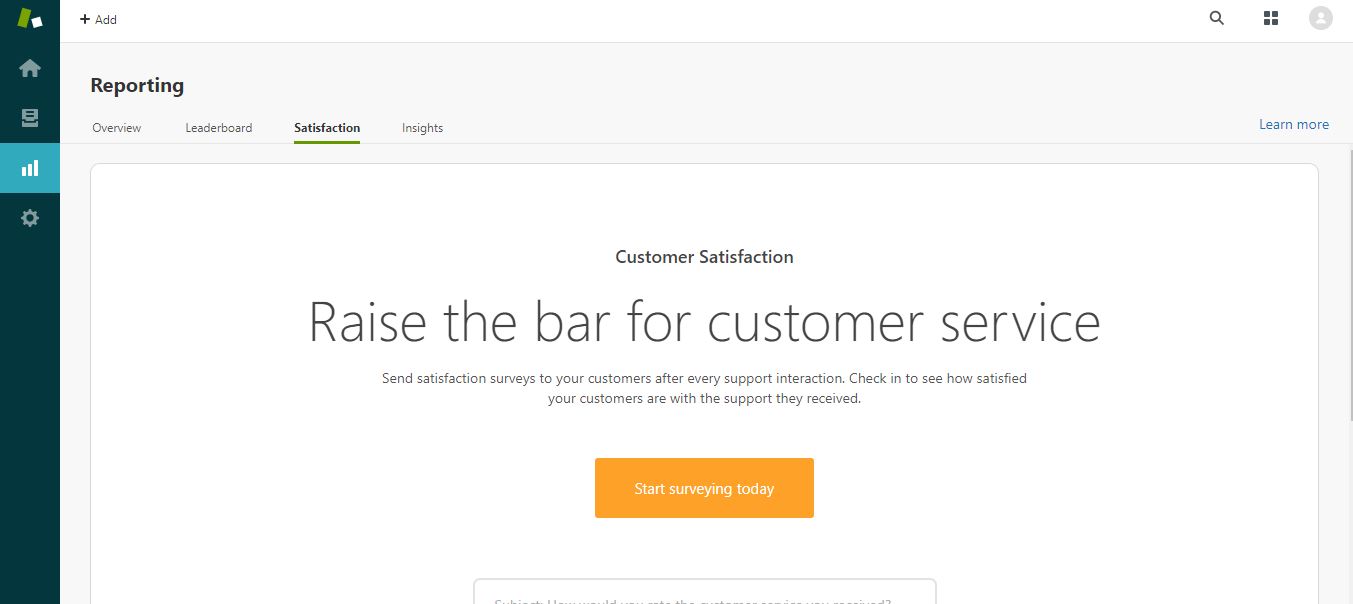
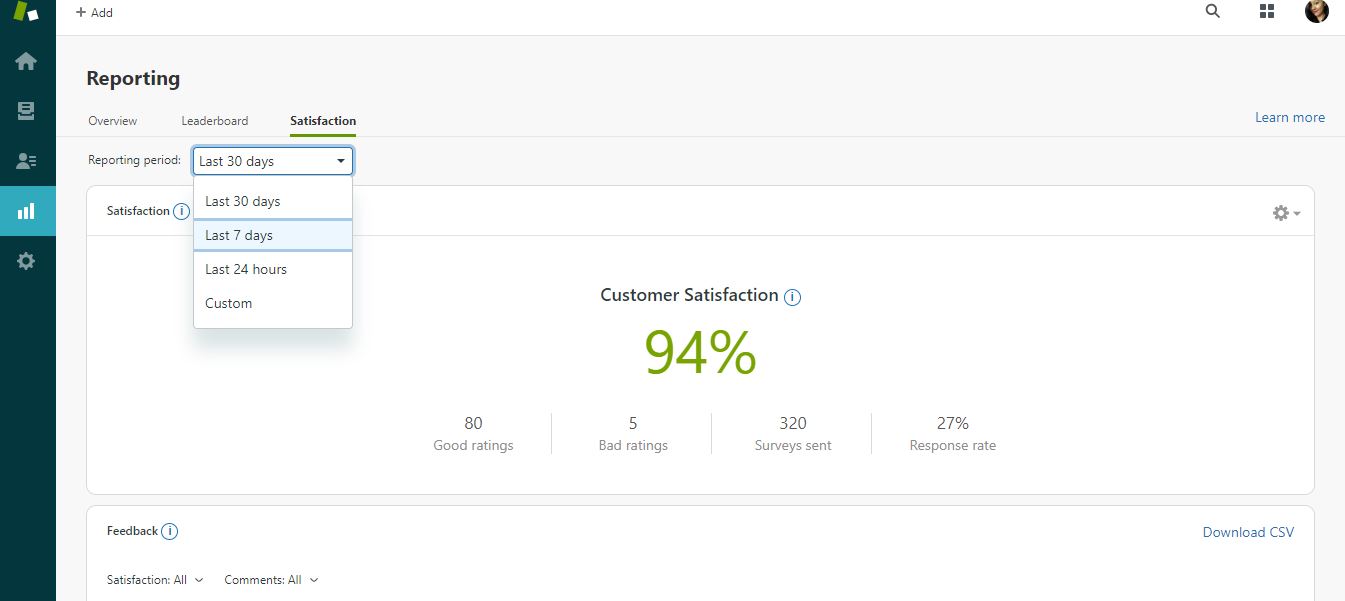
Once activated, you will be able to use the “Satisfaction” tab to look at scores you are receiving from your customers.
Typically, companies use this data to gauge their support team’s weakness (is it response time? Is it attentiveness, or quality of the response itself?) This data will enable you to better manage training and general management of your charges.
How the request is sent
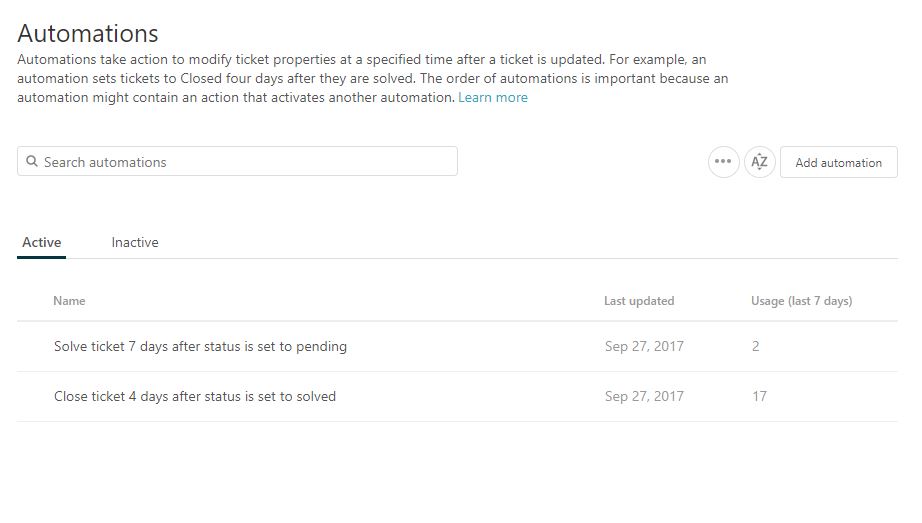
When you enable CSAT, a system-generated automation called “Request customer satisfaction rating” is added to Zendesk Support. We would recommend deactivating this setting, as this automation tends to send multiple surveys which can be overwhelming your customers and effectively hinder your results.
Instead, go to Triggers and add/ edit your own “solved” notifications trigger.
Rename the trigger name to:
- “Send Customer Satisfaction Rating (CSAT) when solved”
And put the conditions as:
- Status - is - solved
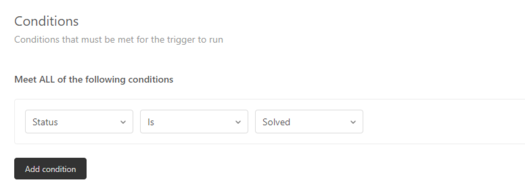
Ensuring the ticket would need to be set as Solved before a survey can be sent.
From there, scroll down to Actions and add these:
- Satisfaction - offered to requester
- Email user - requester
These will prompt the email body to show up.
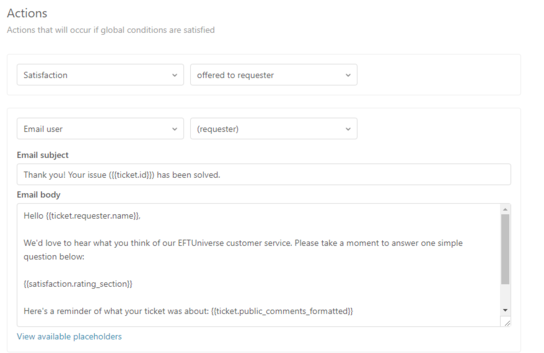
The email body in the trigger uses a placeholder code called “Template:Satisfaction.rating section” to insert the survey questions.
Editing the email
Zendesk’s regular format looks a little something like:
“Hello Template:Ticket.requester.name,
We’d love to hear what you think of our customer service. Please take a moment to answer one simple question below:
Template:Satisfaction.rating section
Here’s a reminder of what your ticket was about: Template:Ticket-of-leave formatted”
If you’d like, you can change this to fit your brand’s voice and vibe. Once you are happy with the email format you have come up with, you can simple Save the Trigger and it should start gathering some feedback :-)

Reviewing CSAT
Once everything is set up, the data will start to trickle in and we you’ll be able to view it all in the Satisfaction tab of Zendesk
One thing to note is that you would need to be an administrator to view this.
You can sort the report by date:
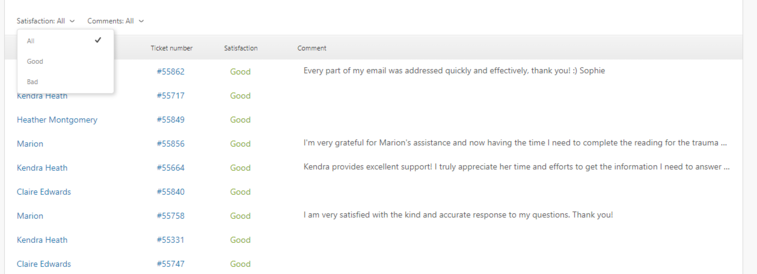
Or by specific categories like bad / good, with comment / no comment :)
And there you have it! Now you’re ready to actionable customer transparency.
More Zendesk Tutorials
Find this tutorial helpful? We’ve published a few more:
If you would like to find out more about how we can help you with your support experience - get in touch!